Saturday, January 25, 2025
Build a firewood shed with step-by-step woodworking instructions
Building Your Dream Firewood Shed: A Step-by-Step Guide
Hey there, fellow fire-lovers! So, you're ready to build your own firewood shed? Fantastic! Storing firewood properly isn't just about keeping it dry â€" it’s about keeping your wood pest-free and ready to burn whenever you need it. This guide will walk you through building a simple, sturdy, and attractive shed, perfect for keeping your winter warmth safe and sound. Let’s get started!

Planning & Materials: Laying the Groundwork
Before you even pick up a saw, a little planning goes a long way. This isn't rocket science, but a bit of forethought saves headaches later.

1. Choosing Your Location:
Think about where you'll be using the firewood. Proximity to your house (but not too close!) is key. Consider sun exposure â€" good airflow is important to help the wood dry, but you don’t want it baking in the sun all day. Also, check local building codes and HOA regulations â€" you might need permits depending on your location and the size of the shed.
2. Designing Your Shed:
Keep it simple! For a first-timer, a simple rectangular shed is your best bet. Determine the size based on how much firewood you need to store. Remember to factor in space for airflow.
3. Gathering Your Materials:
Here's a basic list. Adjust quantities based on your design:
- Pressure-treated lumber for the base and frame (4x4 posts, 2x4s for the walls and roof)
- Plywood or shiplap for siding
- Roofing material (metal roofing is durable and easy to work with)
- Concrete or gravel for the base (optional, but recommended)
- Nails, screws, and a construction adhesive
- Post anchors or concrete footings
- Measuring tape, level, saw (circular saw or hand saw), drill, hammer
- Safety glasses and work gloves (Seriously, wear them!)
Building the Foundation: A Solid Start
A strong foundation is crucial. This will prevent your shed from sinking or shifting over time.
1. Preparing the Ground:
Clear the area of grass, weeds, and any debris. Level the ground as much as possible. You can use a shovel and a level to achieve a relatively flat surface.
2. Creating the Base:
You have a couple of options here:
- Concrete Slab: This is the most durable option, but requires more effort. Pour a concrete slab according to the dimensions of your shed. Allow ample curing time before proceeding.
- Gravel Base: A simpler approach. Dig a shallow pit, fill it with gravel, and compact it thoroughly. This provides excellent drainage.
3. Setting the Posts:
Once your base is ready, set your 4x4 posts at each corner. Use post anchors or concrete footings to secure them firmly to the ground. Make sure the posts are perfectly plumb (vertical) using a level. This is super important for a stable structure.
Framing the Walls & Roof: The Structure Takes Shape
Now comes the fun part â€" building the actual shed!
1. Constructing the Wall Frames:
Build rectangular frames for each wall using 2x4s. Cut the 2x4s to the correct length and fasten them together using nails or screws. Use a construction adhesive for extra strength and to prevent squeaking.
2. Attaching the Wall Frames to the Posts:
Carefully attach the wall frames to the 4x4 posts. Ensure the frames are square and plumb before nailing or screwing them in place. Use plenty of fasteners for a secure connection.
3. Building the Roof Frame:
This will depend on the type of roof you’ve chosen. A simple gable roof (two sloping sides) is easy to construct. Cut the rafters (sloping roof beams) to the correct length and angle and attach them to the top plates of the wall frames. Remember to use a level and square to ensure everything is properly aligned.
Siding & Roofing: Adding the Finishing Touches
Almost there! Now we add the finishing touches to make your shed weather-resistant and aesthetically pleasing.
1. Installing the Siding:
Attach the plywood or shiplap siding to the outside of the wall frames. Use nails or screws, ensuring the siding is aligned and overlaps appropriately. Caulk any gaps to prevent water infiltration.
2. Installing the Roofing:
Lay down roofing felt or underlayment on the roof frame before installing your chosen roofing material (metal roofing is a great choice). Follow the manufacturer's instructions for installing the roofing material. Secure it well to prevent leaks.
Finishing Up: The Home Stretch!
You're in the home stretch! Here are the final steps to complete your firewood shed.
1. Adding a Door:
Cut and install a door using more 2x4s for the frame. You can use pre-hung doors or build your own. Remember to install hinges and a latch or handle.
2. Adding Ventilation:
Cut vents into the sides of the shed to allow for air circulation, preventing mildew and rot. Screen vents to prevent entry of pests like rodents and insects.
3. Final Touches:
Give your shed a final inspection. Caulk any remaining gaps, touch up the paint or stain, and clean up the area. Congratulations! You’ve built your own firewood shed.
Commonly Asked Questions
Q: What kind of wood should I use for the frame?
A: Pressure-treated lumber is best for outdoor projects like this shed because it's resistant to rot and insects.
Q: How much does it cost to build a firewood shed?
A: The cost varies depending on the size and materials you use. You can expect to spend anywhere from $200 to $1000 or more.
Q: Do I need a permit to build a firewood shed?
A: Building codes vary by location. Check with your local authorities to see if you need a permit.
Q: Can I build this shed without any prior woodworking experience?
A: This plan is designed to be relatively simple, but some basic woodworking skills are helpful. Don’t be afraid to ask for help from a more experienced builder if needed.
Q: How do I keep pests out of my firewood shed?
A: Proper ventilation is key, along with sealing any gaps or cracks. Consider using screens on your vents to keep out small animals and insects.
There you have it! With a little planning and elbow grease, you can have a beautiful and functional firewood shed. Happy building!

DIY wooden shed projects simplified
Building Your Dream Shed: A DIYer's Guide
So, you're dreaming of a beautiful, functional wooden shed â€" a place to store your gardening tools, bikes, or maybe even a cozy workshop. Building one yourself might seem daunting, but trust me, it's more achievable than you think! This guide breaks down the process into manageable steps, offering tips and tricks to make your DIY shed project a success. Let's get started!

Planning Your Perfect Shed: Size, Style, and Location
Before you even think about grabbing a hammer, you need a solid plan. This isn't about sketching something on a napkin; it's about visualizing your shed and ensuring it fits your needs and your property.

Choosing the Right Size
How much stuff are you planning to store? A small shed (say, 6ft x 4ft) is great for basic tools and gardening supplies. If you're envisioning a workshop or needing space for larger items like lawnmowers, you'll need something considerably bigger (maybe 8ft x 10ft or even larger!). Measure your potential storage items to get a realistic idea of the space you'll need. Don't forget to factor in walkways â€" you need room to move around inside!
Picking a Style
Do you want a traditional, classic-looking shed or something more modern and sleek? There are tons of designs available online, from simple lean-to sheds to more complex designs with windows and lofts. Browse through pictures for inspiration and consider which style best suits your home and landscaping.
Finding the Ideal Spot
Location, location, location! Choose a level area with good access â€" you don't want to be lugging materials across a muddy field. Consider sunlight (for a naturally lit workshop) and proximity to power sources (if you plan on using electricity). Also, check local building codes and regulations; you might need planning permission depending on the size and location of your shed.
Gathering Your Materials: The Essential Checklist
This is where the real fun begins (or maybe the slightly stressful part, depending on your DIY personality!). Creating a detailed materials list is key to avoiding mid-project panic trips to the hardware store. Remember to buy a little extra of everything â€" just in case!
Wood, Wood, and More Wood!
The heart of your shed. Pressure-treated lumber is ideal for outdoor projects, offering excellent durability and resistance to rot and insects. You'll need planks for the walls, floor, roof, and framing. Consider the thickness you need; thicker lumber is stronger and more durable but also more expensive. A good lumber yard can help you with your calculations and recommendations.
Fasteners and Fittings
Screws, nails, hinges, handles, and latches â€" the list goes on! Make sure you have enough of each type of fastener. Consider using galvanized or stainless steel screws and nails for extra weather resistance. Don't forget things like corner brackets and roof supports for added strength.
Roofing Materials
Asphalt shingles are a popular and relatively inexpensive choice. Consider the style and colour to complement your house and garden. Other options include felt roofing or metal sheeting, each with its own pros and cons in terms of cost, durability, and aesthetic appeal.
Tools of the Trade
You'll need a variety of tools, from basic hand tools like hammers, screwdrivers, and measuring tapes, to more specialized tools like a circular saw, drill, and possibly a post hole digger (depending on your foundation). Rent tools if you don't own them â€" it's often cheaper than buying them for a one-off project.
Building Your Shed: Step-by-Step Guide
Alright, let's get our hands dirty! This is a simplified overview; more detailed instructions can be found in countless online tutorials and shed building books. Remember safety first! Wear appropriate safety gear, including eye protection and gloves.
Laying the Foundation
This step depends on your chosen design and local soil conditions. A simple concrete slab is a great option for stability. Alternatively, you might choose concrete blocks, wooden sleepers, or even just a level compacted ground if your shed is small and lightweight.
Framing the Walls and Floor
Construct the floor frame first, using pressure-treated lumber. Then, build the wall frames, ensuring they are square and plumb. Remember to cut your lumber precisely and use appropriate fasteners to create strong and stable structures.
Raising the Walls
Carefully lift and secure the wall frames onto the floor frame, ensuring everything is aligned. This part might need a helper or two, especially for larger sheds. Temporarily brace the walls until the roof is in place.
Constructing the Roof
The roof design will depend on your chosen shed style. Common designs include a gable roof (triangular) or a shed roof (single slope). Carefully assemble the roof trusses or rafters and secure them firmly to the top plates of the walls. Remember proper rafter spacing for strength and to accommodate your chosen roofing material.
Installing the Roofing
Once the roof structure is in place, you can begin installing your chosen roofing material, following the manufacturer's instructions. Make sure to ensure a watertight seal to protect your shed's contents.
Adding the Finishing Touches
This is where you get to add your personal touch! Install doors, windows, cladding, and any other features you've chosen for your shed. A fresh coat of paint or stain will protect the wood and enhance the aesthetics.
Commonly Asked Questions
Building a shed can raise lots of questions, so here are some common ones:
- How long does it take to build a shed? This depends on the size and complexity of the shed, as well as your experience level. A simple shed could take a weekend, while a more complex project might take several weekends or even longer.
- How much does it cost to build a shed? The cost varies greatly depending on the size, materials, and your choice of finishes. Expect to spend anywhere from a few hundred to several thousand dollars.
- Do I need planning permission? Building regulations vary by location. Check with your local council to determine if you need permission before you start building.
- Can I build a shed by myself? You can, but having a helper, especially for lifting and securing larger components, can be incredibly beneficial. Teamwork makes the dream work!
- What if I make a mistake? Don't worry! Mistakes happen. Plan for some wiggle room in your timeline and budget. Most mistakes can be corrected with a little patience and problem-solving.
Building your own shed is a rewarding project that allows you to create a space perfectly tailored to your needs. While it requires time, effort, and planning, the sense of accomplishment is well worth it. So, grab your tools, and let's get building!
Friday, January 24, 2025
Free 12x24 shed plans for creating a home office or hobby room
Free 12x24 Shed Plans: Transforming a Structure into a Functional Home Office or Hobby Room
This comprehensive guide provides detailed information and considerations for designing and constructing a 12x24 shed suitable for conversion into a home office or hobby room. While free plans are readily available online, understanding the nuances of building codes, material selection, and structural integrity is crucial for a safe and functional outcome. This guide aims to equip you with the knowledge necessary to approach your project with confidence, ensuring a successful and enjoyable build.

I. Preliminary Considerations: Planning and Design

A. Site Selection and Preparation:
The initial step involves careful site selection. Consider factors such as: proximity to your home for easy access, availability of utilities (electricity, potentially water and sewage depending on your intended use), level ground for a stable foundation, and sunlight exposure for natural illumination. Proper site preparation is critical. This includes clearing the area of debris, leveling the ground (consider professional assistance for significant grading), and addressing any potential drainage issues. Ensure your chosen location complies with local zoning ordinances and building codes regarding setbacks from property lines and other structures.
B. Understanding Building Codes and Permits:
Compliance with local building codes is non-negotiable. Failing to obtain the necessary permits and adhere to regulations can lead to significant fines, delays, and potential demolition. Contact your local building department to determine the specific requirements for shed construction in your area. These requirements may cover aspects like foundation type, wall framing, roof design, electrical wiring, and insulation standards. Obtaining the necessary permits prior to commencing construction is crucial to avoid legal complications.
C. Design and Layout:
A 12x24 shed offers ample space for a home office or hobby room. Plan your layout carefully considering the following:
- Work Area: Designate a primary work area with adequate desk space and storage.
- Storage: Incorporate shelving, cabinets, or other storage solutions to maximize space efficiency.
- Lighting: Plan for both natural and artificial lighting, considering window placement and electrical outlets.
- Climate Control: Determine the need for heating and cooling systems, factoring in energy efficiency.
- Accessibility: Ensure easy access for both people and equipment. Consider the size and placement of the door.
Sketching a detailed floor plan is highly recommended before proceeding with the construction. Consider using free online design tools or software to create a visual representation of your planned layout. This allows for refinement and adjustment before material purchasing and construction begin.
II. Material Selection and Acquisition
A. Foundation:
The foundation is the crucial base for your shed. Several options exist, each with its own cost and complexity:
- Concrete Slab: Offers excellent stability and durability but requires significant effort and potentially professional assistance.
- Gravel Base: A simpler and more cost-effective option, providing adequate support on well-drained soil.
- Pier and Beam: Provides good ventilation and allows for drainage but requires more precise planning and execution.
B. Framing Lumber:
Selecting high-quality pressure-treated lumber for the framing is paramount for durability and resistance to rot and insect damage. Pressure-treated lumber should be used for all components in contact with the ground or exposed to the elements. Calculate the necessary lumber quantity accurately using your design plans and purchase with a small buffer to account for potential mistakes or unforeseen needs.
C. Roofing Materials:
The choice of roofing material depends on budget, aesthetic preferences, and climate. Options include:
- Asphalt Shingles: A cost-effective and readily available option, offering decent durability.
- Metal Roofing: Durable, long-lasting, and resistant to harsh weather conditions, but generally more expensive.
D. Siding and Trim:
Siding adds both aesthetic appeal and protection. Common options include:
- Vinyl Siding: Low-maintenance and relatively inexpensive.
- Wood Siding: Offers a natural look but requires more maintenance.
- Metal Siding: Durable and long-lasting, but can be more expensive.
III. Construction Process
A. Foundation Construction:
Carefully follow your chosen foundation method. Ensure the foundation is level and adequately sized to support the weight of the structure. If using a concrete slab, ensure proper curing time before proceeding with framing. For other foundation types, ensure proper drainage and stability.
B. Framing:
Frame the walls, roof, and floor according to your plans, using appropriate techniques for joining lumber and ensuring squareness and plumbness. This step requires precision and accuracy to create a structurally sound building. Double-check measurements and use appropriate fasteners for secure connections. Use a level and plumb bob frequently to ensure accuracy.
C. Roofing Installation:
Install the roofing material according to the manufacturer’s instructions. Pay close attention to sealing and flashing around vents, chimneys (if applicable), and other penetrations to prevent leaks. Proper underlayment is critical for water protection.
D. Siding and Trim Installation:
Install the siding and trim neatly and accurately. Ensure proper alignment and overlap for water resistance. Use appropriate fasteners and caulking to seal gaps and prevent water intrusion.
E. Interior Finishes:
Once the exterior shell is complete, you can move to interior finishes. This includes installing insulation, drywall or paneling, flooring, painting, and electrical wiring. Ensure compliance with building codes for electrical work, especially if you plan on utilizing electrical appliances or computers.
IV. Final Considerations
Remember to meticulously review free plans before starting construction. Cross-reference with local building codes and seek professional advice if needed. This guide provides a framework, but professional consultation is recommended for complex aspects of the project. Careful planning, meticulous execution, and adherence to safety standards are key to creating a durable and functional home office or hobby room.
While free plans can save money, investing in quality materials and potentially seeking professional help for specific tasks (foundation, electrical work, etc.) will yield a superior end product and prevent costly mistakes in the long run. Enjoy the process of transforming your shed into a valuable addition to your home!
Affordable 12x24 shed designs for personal and functional use
Affordable 12x24 Shed Designs for Personal and Functional Use
The acquisition of a storage shed represents a significant investment, offering a practical solution for managing clutter and providing valuable supplementary space. However, navigating the costs associated with construction or purchase can be daunting. This comprehensive guide explores affordable 12x24 shed designs, catering to both personal and functional needs, emphasizing cost-effective strategies and design considerations. A 12x24 shed provides a substantial 288 square feet of space, ample for various applications while remaining manageable in terms of material and labor costs.

Design Considerations for Affordability
Optimizing the design for affordability is crucial. This involves strategic material selection, simplification of construction techniques, and careful planning to minimize waste.

Material Selection: Prioritizing Cost-Effectiveness
The choice of materials significantly impacts the overall cost. While premium materials offer superior durability, opting for more economical alternatives can lead to considerable savings without compromising functionality.
- Framing Lumber: Pressure-treated lumber offers excellent durability against rot and insect infestation, but it's more expensive than standard lumber. Consider using standard lumber for less exposed areas of the shed's structure and reserving pressure-treated lumber for critical elements like the foundation and bottom plates.
- Siding: Vinyl siding offers a low-maintenance and aesthetically pleasing option. However, metal siding, though potentially more expensive upfront, can last considerably longer and require less maintenance over its lifespan. Consider the long-term cost-benefit analysis when comparing these options. Other budget-friendly options include corrugated metal or composite materials.
- Roofing: Asphalt shingles are a common and affordable roofing material. However, explore options such as metal roofing, which can be more durable and long-lasting, resulting in lower long-term maintenance costs. Consider the climate; a more durable roofing material might be necessary in areas prone to harsh weather.
- Foundation: Concrete slabs are durable but expensive. Gravel foundations offer a significantly more affordable alternative, especially for lighter sheds. However, ensuring proper drainage is crucial to prevent water damage.
Simplified Construction Techniques: Reducing Labor Costs
Streamlining the construction process can dramatically reduce labor costs. This involves selecting designs that minimize complex cuts and joints. Utilizing pre-fabricated components, such as pre-cut lumber or pre-assembled wall panels, can significantly accelerate construction and reduce the need for specialized labor.
- Prefabricated components: Utilize pre-cut lumber kits, pre-assembled wall panels, or even consider purchasing a pre-fabricated shed kit. These options significantly reduce construction time and complexity.
- Standard dimensions: Utilizing standard lumber sizes will minimize cutting and waste, reducing both material and labor costs.
- Simple roof design: A gable roof is relatively easy to construct compared to more complex designs such as hip or gambrel roofs. A simple design translates to lower labor costs and less potential for errors.
Minimizing Waste: Efficient Material Management
Careful planning and precise measurements are essential to minimize material waste. Accurate calculations of lumber requirements, siding panels, and roofing materials can lead to substantial savings. Consider using leftover materials for smaller projects or repurposing them.
- Detailed plans: Invest in detailed construction plans to ensure accurate material estimations.
- Efficient cutting techniques: Employ efficient cutting techniques to minimize waste. Consider using a miter saw for precise cuts.
- Material recycling: Repurpose leftover materials where possible, or consider recycling options for responsible waste management.
Functional Shed Designs: Maximizing Utility
A well-designed 12x24 shed can serve a multitude of purposes. Consider the specific functions required to tailor the design for optimal utility.
Workshop Shed: Dedicated Workspace
For hobbyists and DIY enthusiasts, a workshop shed is a valuable asset. The design should incorporate ample workspace, adequate electrical outlets, and robust shelving for tool and material storage. Consider including a workbench, a dedicated area for power tools, and good lighting.
Storage Shed: Efficient Organization
A storage shed primarily focused on organization should feature robust shelving systems, potentially incorporating loft storage to maximize vertical space. Consider the types of items to be stored to optimize shelving heights and configurations. Ventilation should be adequate to prevent moisture build-up.
Combination Shed: Versatile Functionality
Combining storage and workshop functionality is possible, but requires careful planning. Designate separate areas for each purpose to maintain organization. Ensure adequate lighting and electrical outlets in both sections. Consider including a small work area within the storage section for smaller tasks.
Gardening Shed: Dedicated Garden Equipment Storage
For gardeners, a shed dedicated to equipment storage should feature easy access to the outside, potentially through a side door. Consider incorporating shelving for smaller tools and a dedicated area for larger equipment like wheelbarrows or lawnmowers. Ventilation is crucial to prevent mildew.
Cost-Effective Construction Strategies
Beyond design, several construction strategies can contribute to reducing the overall cost.
DIY Construction: Reducing Labor Costs Significantly
Undertaking the construction yourself is the most significant cost-saving measure. However, this requires a reasonable level of DIY skills and experience. If you lack experience, start with simpler designs and consider seeking guidance from experienced builders for challenging aspects.
Utilizing Recycled or Reclaimed Materials: Sustainable and Affordable
Incorporating recycled or reclaimed materials, like salvaged lumber or repurposed metal, can dramatically reduce material costs and promote environmental sustainability. However, ensure the materials are structurally sound and suitable for the intended purpose.
Phased Construction: Managing Budget Effectively
Breaking down the construction into manageable phases, such as foundation, framing, siding, and roofing, allows for better budget control and allows for adjustments based on available funds.
In conclusion, constructing an affordable yet functional 12x24 shed is achievable with careful planning and strategic decision-making. By prioritizing cost-effective materials, simplifying designs, and employing efficient construction techniques, one can create a valuable asset that meets both personal and functional needs without exceeding budgetary constraints. Remember that prioritizing long-term durability can often translate to reduced maintenance costs in the years to come.
DIY shed projects with materials list for a smooth building process
DIY Shed Projects: A Comprehensive Guide with Materials Lists
Constructing a shed offers a rewarding DIY project, providing valuable storage space and enhancing property aesthetics. This guide details several shed designs, accompanied by comprehensive materials lists, ensuring a smooth and efficient building process. Careful planning and preparation are crucial for a successful outcome. This guide aims to provide the necessary information to approach your DIY shed project with confidence.

1. The Basic 8x6ft Garden Shed
This design is ideal for beginners, offering ample storage for gardening tools, bicycles, or other outdoor equipment. Its compact size minimizes material costs and construction time.

1.1 Design Specifications:
- Dimensions: 8ft (Length) x 6ft (Width) x 6ft (Height)
- Framing: Pressure-treated lumber (4x4 posts, 2x4 studs, 2x6 rafters)
- Cladding: Shiplap or plywood siding
- Roofing: Asphalt shingles or corrugated metal
- Door: Single pre-hung door (32" x 80")
- Foundation: Concrete slab or compacted gravel base
1.2 Materials List:
Quantities are estimates and may vary based on specific design adjustments and waste. Always purchase extra materials to account for potential errors or unforeseen circumstances.
- Pressure-Treated Lumber:
- Four 4x4 posts, 6ft long (for corner posts)
- Eight 2x4s, 8ft long (for wall studs)
- Six 2x4s, 6ft long (for wall plates)
- Eight 2x6s, 8ft long (for rafters)
- Two 2x6s, 6ft long (for ridge board)
- Various 2x4s for bracing and support (estimated 20 linear feet)
- Siding: Shiplap or plywood siding (approximately 100 sq ft)
- Roofing: Asphalt shingles or corrugated metal (approximately 100 sq ft)
- Door: Single pre-hung door (32" x 80")
- Hardware: Nails (various sizes), screws, hinges, door handle, exterior-grade caulk
- Foundation Materials: Concrete mix (for slab) or gravel (for gravel base)
- Other: Construction plans, measuring tape, level, saw, hammer, drill, safety glasses, work gloves
2. The Enhanced 10x12ft Shed with Windows
This larger shed provides more storage and incorporates windows for natural light and ventilation. It requires more advanced carpentry skills and materials.
2.1 Design Specifications:
- Dimensions: 10ft (Length) x 12ft (Width) x 7ft (Height)
- Framing: Pressure-treated lumber (4x4 posts, 2x4 studs, 2x6 rafters, 2x4 wall bracing)
- Cladding: T&G (Tongue and Groove) siding or premium vinyl siding
- Roofing: Architectural asphalt shingles
- Door: Double pre-hung door (36" x 80" each)
- Windows: Two double-hung windows (30" x 36")
- Foundation: Concrete slab or engineered wood I-beam foundation
2.2 Materials List:
- Pressure-Treated Lumber:
- Four 4x4 posts, 7ft long (for corner posts)
- Twelve 2x4s, 10ft long (for wall studs)
- Ten 2x4s, 12ft long (for wall plates)
- Twelve 2x6s, 10ft long (for rafters)
- Two 2x6s, 12ft long (for ridge board)
- Various 2x4s for bracing and support (estimated 40 linear feet)
- Siding: T&G siding or premium vinyl siding (approximately 200 sq ft)
- Roofing: Architectural asphalt shingles (approximately 200 sq ft)
- Doors: Double pre-hung doors (36" x 80" each)
- Windows: Two double-hung windows (30" x 36") including window trim
- Hardware: Nails (various sizes), screws, hinges, door handles, window hardware, exterior-grade caulk, flashing
- Foundation Materials: Concrete mix (for slab) or engineered wood I-beams (for I-beam foundation)
- Other: Construction plans, measuring tape, level, saw, hammer, drill, circular saw, safety glasses, work gloves, window installation materials
3. The Gable Roof Shed with Loft Storage
This design maximizes storage space by incorporating a loft area accessible via a ladder. This project demands intermediate to advanced carpentry skills.
3.1 Design Specifications:
- Dimensions: 12ft (Length) x 8ft (Width) x 8ft (Height to Peak)
- Framing: Pressure-treated lumber (4x4 posts, 2x4 studs, 2x6 rafters, 2x4 floor joists)
- Cladding: Metal roofing and siding for durability
- Roofing: Corrugated metal roofing
- Door: Single pre-hung double door (36" x 80")
- Loft Access: Fixed ladder or pull-down stairs
- Foundation: Concrete pier and beam foundation
3.2 Materials List:
- Pressure-Treated Lumber:
- Four 4x4 posts, 8ft long (for corner posts)
- Twelve 2x4s, 12ft long (for wall studs)
- Ten 2x4s, 8ft long (for wall plates)
- Twelve 2x6s, 12ft long (for rafters)
- Six 2x6s, 8ft long (for ridge board and loft supports)
- Eight 2x4s, 8ft long (for loft floor joists)
- Various 2x4s for bracing and support (estimated 60 linear feet)
- Siding: Corrugated metal siding (approximately 250 sq ft)
- Roofing: Corrugated metal roofing (approximately 250 sq ft)
- Doors: Single pre-hung double door (36" x 80")
- Loft Access: Fixed ladder or pull-down stairs
- Hardware: Nails (various sizes), screws, hinges, door handles, exterior-grade caulk, flashing, metal roofing fasteners
- Foundation Materials: Concrete mix (for pier and beam foundation)
- Other: Construction plans, measuring tape, level, saw, hammer, drill, circular saw, metal snips, safety glasses, work gloves, ladder
Disclaimer: These materials lists are estimates and may not encompass all necessary items. Always refer to detailed construction plans and adjust quantities based on your specific needs and chosen materials. Consult local building codes and obtain necessary permits before commencing construction. Safety should always be your top priority. Wear appropriate safety gear and follow all safety precautions when working with power tools and construction materials.
Free 8x10 shed woodworking plans for creating extra storage
Free 8x10 Shed Woodworking Plans for Enhanced Storage Solutions
This comprehensive guide provides detailed, free woodworking plans for constructing an 8x10 shed, offering a substantial increase in storage capacity for various needs. The plans are designed for intermediate-level woodworkers with experience in basic carpentry techniques. While free, these plans require careful attention to detail and adherence to safe woodworking practices for successful completion. This document will meticulously outline each step of the process, from material selection and preparation to final assembly and finishing.

Phase 1: Planning and Material Acquisition

Site Preparation and Foundation
Before commencing construction, meticulous site preparation is crucial. Select a level, stable location capable of supporting the shed's weight. Clear the area of vegetation and debris. For an 8x10 shed, a concrete slab foundation provides the most robust and durable base. Alternatively, a well-prepared gravel base with pressure-treated lumber framing can suffice, but offers less stability and longevity. Accurate measurements are paramount to ensure the foundation aligns perfectly with the shed's dimensions. Mark the perimeter clearly using stakes and string lines. The foundation should extend beyond the shed's footprint by several inches on all sides to provide support and prevent settling.
Material List and Sourcing
Accurate material estimation is essential to avoid costly delays. The following list provides a general guideline, and quantities may vary slightly depending on specific design choices and local lumber availability. Always purchase additional lumber to account for potential errors or imperfections.
- Pressure-treated lumber for foundation/base (if not using concrete): Calculate the required lengths and quantities based on your chosen foundation design. Pressure-treated lumber is crucial for longevity and resistance to rot and insect damage.
- Framing lumber (2x4s and 2x6s): Detailed specifications for quantities of 2x4s and 2x6s for walls, roof trusses, and floor joists are provided in the accompanying detailed plans (see Appendix A). Choose high-quality lumber for optimal strength and durability.
- Sheathing (plywood or OSB): Calculate the amount needed for wall and roof sheathing, ensuring sufficient overlap for weatherproofing. Plywood provides a superior finish but is more expensive than OSB (Oriented Strand Board).
- Roofing materials: Select asphalt shingles, metal roofing, or other appropriate material based on your budget and aesthetic preferences. Calculate the quantity needed based on the roof's dimensions and chosen material's coverage rate.
- Siding: Choose a siding material (e.g., vinyl, wood, metal) to enhance the shed's aesthetic appeal and protection from the elements. Account for overlapping and waste when calculating quantities.
- Doors and windows: Select pre-hung doors and windows for ease of installation. Measure carefully and ensure compatibility with the shed's dimensions.
- Fasteners: A comprehensive assortment of nails, screws, and bolts is necessary. Use galvanized or stainless steel fasteners for superior corrosion resistance.
- Hardware: This includes hinges, handles, latches, and any other necessary hardware for doors and windows.
Phase 2: Construction Process
Floor Framing and Installation
Once the foundation is complete, begin by constructing the floor frame. Lay out the floor joists according to the detailed plans (Appendix A), ensuring proper spacing and support. Securely fasten the joists to the foundation using appropriate fasteners. Install plywood or OSB sheathing, ensuring tight alignment and secure fastening. Apply a moisture barrier (e.g., polyethylene sheeting) to protect against moisture damage.
Wall Framing and Assembly
Construct the wall frames according to the detailed dimensions provided in the plans (Appendix A). Carefully align the studs and ensure proper spacing for structural integrity. Use appropriate fasteners to secure the wall panels. Install sheathing on the exterior side of the walls, ensuring proper alignment and fastening. Attach any windows and doors before installing the walls onto the floor frame.
Roof Truss Construction and Installation
Construct the roof trusses according to the detailed plans (Appendix A), ensuring precise measurements and proper bracing for stability. Install the trusses onto the top plates of the walls, ensuring even spacing and secure fastening. Install roof sheathing, ensuring proper overlap and secure fastening. This process requires careful attention to detail to ensure roof stability and prevent leaks.
Exterior Cladding and Finishing
Install the chosen exterior siding, following manufacturer's instructions for proper installation. Ensure proper alignment, overlapping, and secure fastening. Apply any necessary trim and molding to enhance the shed's appearance and protect against water damage. Apply exterior paint or sealant to protect the siding and enhance the shed’s longevity.
Interior Finishing and Details
Install interior wall coverings, such as drywall or plywood. Apply paint or wallpaper to create a finished interior. Install any necessary shelving or storage solutions according to your specific needs. Ensure proper lighting and ventilation are installed to create a functional and well-lit interior space.
Phase 3: Final Inspection and Maintenance
Upon completion, conduct a thorough inspection to ensure structural integrity and adherence to building codes. Inspect for any loose connections, damaged materials, or potential safety hazards. Address any issues before proceeding to the next stage. Regular maintenance is crucial to preserve the shed's integrity and longevity. This includes periodic inspections for damage, prompt repairs, and appropriate cleaning and sealing to protect against weather damage and pest infestation.
Appendix A: Detailed 8x10 Shed Woodworking Plans (Not Included in this Text â€" Available upon Request)
Detailed plans, including precise measurements, cut lists, and diagrams, are available upon request. These plans will provide all the necessary information for successful construction of the 8x10 shed. Note that you should always check your local building codes before commencing any construction project.
Disclaimer: These plans are for informational purposes only. The author assumes no liability for any damages or injuries that may occur during the construction process. Always prioritize safety and consult with qualified professionals if needed.
How to Build a Lean-To Shed That Will Organize Your Yard and Your Life
How to Build a Lean-To Shed That Will Organize Your Yard and Your Life
Okay, let's talk sheds. Specifically, lean-to sheds. Because, let's be honest, a cluttered yard is a cluttered mind (or at least a cluttered weekend!). And a lean-to shed? That's your ticket to yard-organization nirvana. It's a project that's totally doable, even if your DIY skills are more "enthusiastic beginner" than "master craftsman." This guide will walk you through building one, step by step, in a way that's hopefully as stress-free as possible.

Planning Your Lean-To Shed: Dream Big, Plan Smart
Before you even grab a hammer, you've gotta plan. This isn't about throwing some boards together â€" we're building something that's going to last. And, more importantly, something that's actually *useful* to you.

Choosing the Right Spot:
Where will your new organizational haven live? Consider these factors:
- Sunlight: Do you need a sunny spot for drying clothes or gardening tools? Or would you prefer some shade?
- Accessibility: Will you be able to easily access the shed from your house or yard? Consider the pathway.
- Local Regulations: Check your local building codes and homeowner's association rules. You might need permits or adhere to certain size restrictions.
- Support Structure: A lean-to needs a strong existing wall or structure to lean against. Make sure it’s sturdy enough to support the weight of your shed.
Size and Design:
How much stuff are you planning to store? A small lean-to might be perfect for gardening tools, while a larger one could house bicycles, outdoor furniture, and more. Think about the height you'll need to comfortably access items. Sketch out a few design options on paper â€" it’s surprisingly helpful!
Materials List:
Creating a comprehensive list before heading to the lumberyard is crucial. Don't forget the small stuff! Here's a general list; adjust it based on your design:
- Pressure-treated lumber for the base and framing (consider the size and weight you'll be storing)
- Plywood or other sheathing for the walls and roof
- Roofing material (shingles, metal, etc.)
- Nails, screws, and other fasteners
- Weatherproofing materials (paint, sealant)
- Optional: Door hardware, windows, shelving
Building Your Lean-To Shed: Hands-On Action
Alright, let’s get our hands dirty! Remember safety first. Wear safety glasses, work gloves, and sturdy shoes.
Laying the Foundation:
Start by leveling the ground where the shed will sit. A compacted gravel base will provide a solid foundation and help with drainage. This is especially important if your ground is prone to settling.
Framing the Base:
Using your pressure-treated lumber, construct a rectangular frame for the base of your lean-to. Ensure the frame is level and square. This will be the foundation for the entire structure.
Building the Walls:
Attach the sheathing (plywood or other material) to the frame. You might need to cut the sheathing to fit. If you're adding a door, cut the opening now and install the door frame.
Constructing the Roof:
This is where the "lean-to" part comes in! The roof will be supported by rafters that lean against the existing wall or structure. Make sure the rafters are properly secured at both ends. Then, attach the roofing material â€" shingles, metal sheeting, or whatever you've chosen. Remember to ensure proper overhang to protect the walls from rain.
Finishing Touches:
Once the structure is complete, add any finishing touches you want, like paint, sealant, shelves, and a door. This is where you can really personalize your shed. A fresh coat of paint can make a huge difference!
Maintaining Your Lean-To Shed: Keeping it in Tip-Top Shape
Building the shed is just half the battle. Regular maintenance will ensure your investment lasts. Here are a few tips:
- Regular Cleaning: Sweep out leaves and debris to prevent buildup.
- Inspect for Damage: Check for loose boards, damaged roofing, or signs of rot or pest infestation.
- Weatherproofing: Apply a fresh coat of paint or sealant every few years to protect the wood from the elements.
Commonly Asked Questions
Here are some questions I often get about building lean-to sheds:
Q: Do I need a permit to build a lean-to shed?
A: It depends on your local regulations. Some areas require permits for any structure, regardless of size, while others have size limitations. Check with your local building department before starting construction.
Q: How much does it cost to build a lean-to shed?
A: The cost varies depending on the size, materials, and complexity of your design. You can build a basic lean-to for a few hundred dollars, but more elaborate designs can cost significantly more.
Q: What kind of wood should I use?
A: Pressure-treated lumber is recommended for outdoor use, as it's resistant to rot and insect damage. Avoid using untreated lumber, as it will quickly deteriorate in the elements.
Q: How long does it take to build a lean-to shed?
A: This depends on your experience and the complexity of your design. A simple lean-to can be built in a weekend, while more complex designs might take several days or weeks.
Q: Can I build a lean-to shed against my house?
A: Yes, but make sure the existing wall is sturdy enough to support the weight of the shed and that you adhere to any relevant building codes and regulations.
And there you have it! Building a lean-to shed is a rewarding project that can transform your yard and your life. Remember to take your time, plan carefully, and don't be afraid to ask for help if you need it. Happy building!
Affordable wooden shed with loft for beginners
Building Your Dream (and Affordable!) Wooden Shed with Loft: A Beginner's Guide
So, you're dreaming of a beautiful, functional shed â€" maybe even one with a loft! But the prices you're seeing online are making your wallet weep. Don't worry, friend! Building your own shed isn't as daunting as it seems, especially if you break it down into manageable steps. This guide is designed for absolute beginners, focusing on creating an affordable wooden shed with a loft that you can be proud of.

Planning Your Shed: Dreams vs. Reality (and Budget!)
Before you even think about hammering a nail, let's get the planning done. This is the crucial step that will save you headaches (and money) down the line. Don't skip it!

Size and Location:
Think realistically about the size you need. A smaller shed is cheaper to build and easier to manage, especially for a first-timer. Consider what you'll be storing â€" garden tools, bicycles, seasonal decorations? Measure carefully to ensure you have enough space. Location matters too! Check local building codes and regulations regarding setbacks from property lines and easements. You'll also want to consider access for materials delivery and future maintenance.
Design and Materials:
Simple is often best, especially when starting out. A rectangular shed is the easiest to build. Think about the style you want â€" a more rustic look or something cleaner and more modern? This will influence your material choices. Pressure-treated lumber is a great option for its durability and affordability. Consider using reclaimed or recycled wood if you're environmentally conscious and can source it affordably. Don't forget about the roof! A simple gable roof is easy to construct. You'll need to decide between asphalt shingles, metal roofing, or even recycled plastic roofing materials â€" each has cost and durability implications.
Budgeting:
Create a detailed budget! This includes not only the lumber and other materials but also tools (if you need to buy them), fasteners, and any permits required. Building a shed involves hidden costs, so it's wise to add a 10-15% buffer for unexpected expenses. Check local lumberyards for prices and sales â€" you might be surprised at the deals you can find!
Gathering Your Tools and Materials:
Once your plan is finalized, it’s time to gather the necessary tools and materials. Don’t feel pressured to buy everything brand new. Borrowing from friends or renting tools can save a significant amount of money.
Essential Tools:
- Measuring tape
- Level
- Hammer
- Saw (circular saw recommended, but a hand saw will work)
- Drill with various drill bits
- Screwdriver (or impact driver)
- Shovel
- Post-hole digger (optional, depending on your foundation)
Materials List (this will vary based on your design, but here's a general idea):
- Pressure-treated lumber for the frame, walls, and floor
- Plywood for the floor and loft
- Roofing materials (shingles, metal, etc.)
- Fasteners (nails, screws)
- Concrete mix (for the foundation, if you're not using a gravel base)
- House wrap or tar paper (for weatherproofing)
- Exterior paint or stain (optional)
- Loft support beams and flooring
Building Your Shed: Step-by-Step
This is where the fun (and hard work!) begins. Remember, take your time, and don't be afraid to ask for help. There are tons of online resources, including videos, that can guide you through each step. Here’s a simplified overview:
Foundation:
A solid foundation is key. You can opt for a simple gravel base (easier and cheaper) or a concrete slab (more durable but more expensive and labor-intensive). Level the ground thoroughly before laying your foundation. For the gravel base, compact the gravel well to prevent settling. If using concrete, ensure proper curing time before proceeding.
Framing:
Build the frame of your shed using pressure-treated lumber. Start with the base, then erect the walls, ensuring they're square and plumb. Use a level constantly to check for accuracy! Once the walls are up, construct the roof frame, ensuring proper roof pitch for water runoff.
Sheathing and Roofing:
Apply sheathing (plywood) to the walls and floor, creating a solid surface. Install house wrap or tar paper for weatherproofing. Then, install your chosen roofing material. This is crucial for protecting your shed from the elements.
Loft Construction:
Once the main structure is complete, it’s time for the loft! This involves adding support beams and building a small platform or floor. Ensure the loft framing is securely attached to the main structure for safety and stability. Add stairs or a ladder for access.
Finishing Touches:
Add doors, windows, and any other desired features. Consider painting or staining the exterior to protect the wood and add a personal touch. Remember to seal any gaps or cracks to prevent water damage.
Safety First!
Safety should always be your top priority. Wear appropriate safety gear, including safety glasses, work gloves, and hearing protection. Be careful when using power tools, and always follow the manufacturer's instructions. If you're unsure about anything, don't hesitate to consult with a more experienced builder or seek professional help.
Commonly Asked Questions
Q: How long will it take to build a shed with a loft?
A: This varies greatly depending on your experience, the complexity of the design, and the weather conditions. Expect to spend several weekends, perhaps even longer for a complete beginner.
Q: Can I build a shed without any prior experience?
A: Absolutely! This guide is designed for beginners. However, be prepared for a learning curve. Don't hesitate to seek guidance from online resources or experienced friends.
Q: How much will it cost to build an affordable shed with a loft?
A: The cost varies greatly depending on your location, materials, and size. You can expect to spend anywhere from a few hundred to a couple of thousand dollars, depending on your choices.
Q: What permits do I need?
A: Building codes and permit requirements vary by location. Check with your local building department before starting construction.
Q: What if I encounter problems during construction?
A: Don't panic! There are many online resources and forums where you can seek help. You can also consult with experienced builders or contractors.
Building your own shed with a loft is a rewarding experience. With careful planning, attention to detail, and a little patience, you can create a beautiful and functional addition to your property. Happy building!
Thursday, November 21, 2024
How to Build a Wood Pallet Shed: A Simple and Affordable Outdoor Project
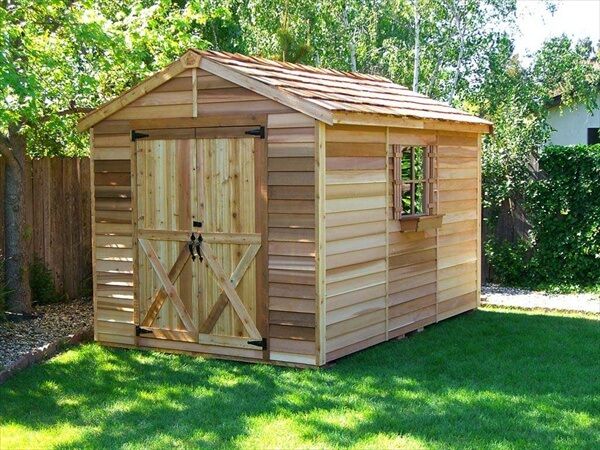
How to Build a Wood Pallet Shed: A Simple and Affordable Outdoor Project
Hey there, fellow DIY enthusiasts! So you're looking to build a shed, huh? That's awesome! Building your own shed can be incredibly rewarding, and using reclaimed wood pallets makes it even more satisfying (and budget-friendly!). Let’s dive into how to build a simple, affordable, and surprisingly sturdy pallet shed. This isn't going to be some fancy, architect-designed masterpiece, but it'll be perfect for storing garden tools, outdoor furniture, or whatever you need to keep dry and safe.1. Planning and Gathering Supplies: The Foundation of Your Project
Before you even think about hammering a nail, you need a plan. Seriously, even a simple sketch on a napkin will help! Consider these points:1.1 Size and Location
How big does your shed need to be? Think about what you'll be storing. A smaller shed is quicker and easier to build. Also, choose a location that's level, relatively dry, and easily accessible. You'll also want to check local building codes â€" some areas have restrictions on shed sizes or require permits.
1.2 Pallet Sourcing
This is where the fun (and sometimes the challenge) begins! You can find free pallets behind businesses, construction sites, or even on Craigslist or Facebook Marketplace. Just be sure to check the condition â€" look for pallets that are sturdy, free from rot, and haven't been treated with harmful chemicals (look for the heat-treated stamp â€" HT). You'll probably need at least 10-15 pallets, depending on the size of your shed. It’s always better to have a few extra!
1.3 Tools and Materials
Besides the pallets, you'll need some basic tools and materials:
- Hammer
- Nails (various sizes, including longer ones for framing)
- Measuring tape
- Level
- Shovel (for preparing the ground)
- Saw (circular saw or hand saw)
- Safety glasses
- Work gloves
- Optional: A crowbar or pallet breaker to dismantle stubborn pallets
- Optional: Screws and a drill/driver for a stronger build
- Optional: Plywood for the roof and back wall if you want a cleaner look.
- Optional: Tarpaulin or roofing felt for waterproofing
2. Preparing the Pallets: Cleaning and Disassembly (if needed)
Once you have your pallets, give them a good clean. Use a brush, water, and maybe some soap to remove dirt, debris, and any loose nails or splinters. You'll want to check for any signs of rot or damage. If a pallet is too damaged, it's better to toss it and find a replacement.
Now, you might need to partially disassemble some pallets to get the pieces you need for the frame. This is where a crowbar or pallet breaker can be helpful. Don't be afraid to get your hands dirty â€" this part can be a little labor-intensive, but it's worth it!
3. Building the Frame: The Backbone of Your Shed
With your cleaned and prepped pallets (or individual pieces), you're ready to build the frame. This is where your plan comes in handy. I recommend building a rectangular frame for the base, using sturdy pallet beams. Make sure it's level and square. You can use longer nails or even screws here for extra strength. Remember, you're aiming for a sturdy foundation for your shed.
Once your base frame is complete, you can start adding the side and back walls. Use more pallet pieces to create the framework for these, making sure they are firmly attached to the base frame. If you are aiming for a higher shed, you may need to construct multiple levels of pallet framing for the sides.
4. Adding the Walls and Roof: Enclosing Your Space
This is where the remaining pallets come into play! Start attaching the pallets to the frame you created. You might need to cut some pallets to fit certain spaces or angles. Remember, it doesn't need to be perfectly aligned â€" rustic charm is part of the pallet shed appeal! Use a good number of nails for each pallet to secure it to the frame.
For the roof, you have a couple of options: you can use more pallets, potentially cutting them to fit the angle of the roof, or you can use plywood for a cleaner, more water-resistant finish. If you’re using pallets, ensure they are overlapped for better weather protection. No matter which option you choose, you'll want to make sure the roof has a slight slope to help with water runoff. Consider adding some kind of waterproofing, like roofing felt or a tarp, to protect your stored items from the elements.
5. Final Touches and Refinements: Adding the Finishing Touches
Once the main structure is complete, you can add those extra touches that will make your shed truly yours! Consider adding a simple door using more pallet pieces or even a repurposed door from a discarded cabinet. You can also add a small window for extra light and ventilation. Finally, a coat of weather-resistant paint or sealant will protect your shed and give it a more polished look.
6. Commonly Asked Questions
Q: How long does it take to build a pallet shed?
A: The time it takes depends on the size and complexity of your shed, as well as your experience level. Expect to spend anywhere from a weekend to several weekends, depending on your progress.
Q: Are pallet sheds structurally sound?
A: With proper construction, they can be surprisingly strong. The key is using sturdy pallets, securely attaching them to the frame, and creating a solid base. However, they might not be suitable for storing very heavy items.
Q: How do I make my pallet shed waterproof?
A: Use overlapping pallets on the roof, and consider adding a layer of roofing felt or a tarp for additional waterproofing. A sealant on the exterior will also help repel moisture.
Q: What if I don't find enough free pallets?
A: You can often buy used pallets from businesses or online marketplaces for a reasonable price. It might not be as cost-effective as using free pallets, but it's still significantly cheaper than buying new lumber.
Q: Do I need a building permit?
A: Building codes vary by location. Check with your local authorities to determine if you need a permit before starting your project.
There you have it! Building a pallet shed is a fantastic way to get creative, save money, and create a practical and useful addition to your outdoor space. Remember to prioritize safety and take your time. Happy building!
Step-by-Step Lean-To Shed DIY: How to Build a Functional Shed

Step-by-Step Lean-To Shed DIY: How to Build a Functional Shed
Hey there, fellow DIY enthusiasts! So you're thinking about building your own lean-to shed? Fantastic! It's a super rewarding project, and way more achievable than you might think. This guide will walk you through the whole process, from planning to the final nail. Grab your coffee, let's get started!Phase 1: Planning and Preparation â€" Laying the Foundation (Literally!)
Before you even think about touching a saw, you need a solid plan. This isn't rocket science, but a little forethought saves a ton of headaches down the line.1.1. Location, Location, Location!
First things first: where's this shed going to live? Consider proximity to your house (for easy access), sunlight (for good ventilation and drying if you're storing things that need it), and drainage (you don't want a soggy shed!). Check local building codes â€" you might need permits depending on your location and the shed's size. Measure the area carefully and mark the boundaries with stakes and string.
1.2. Size and Design Matters
How big do you need your shed to be? Think about what you'll be storing â€" lawnmower, bikes, gardening tools? A lean-to's simplicity lends itself well to smaller spaces, but you can still get surprisingly roomy with clever planning. Sketch out your design, noting dimensions. Remember, lean-tos are typically attached to an existing structure â€" make sure you’ve got a suitable wall! And the angle of the roof needs to shed water efficiently. I personally recommend a gentle slope (around 15-20 degrees) for ease of construction and weather resistance.
1.3. Materials List â€" Stock Up!
This is where your design comes into play. You’ll need a list of materials. I recommend creating a spreadsheet to keep things organised. Here are some essentials:
- Pressure-treated lumber for the base and framing (consider the dimensions you decided on earlier)
- Plywood or OSB (Oriented Strand Board) for sheathing
- Roofing felt and your chosen roofing material (shingles, metal, etc.)
- Nails and screws (various sizes)
- Concrete (or other suitable base material) for the foundation
- Exterior-grade paint or stain (optional, but highly recommended for longevity)
- Tools: measuring tape, saw (circular saw is ideal, but a hand saw works too!), hammer, drill, level, safety glasses, work gloves.
Don't forget to factor in extra materials â€" it's always better to have some leftover than to run short halfway through the project!
Phase 2: Construction â€" Getting Your Hands Dirty
Alright, let's build! Remember safety first â€" wear appropriate safety gear.2.1. Building the Base â€" A Solid Foundation
For a lean-to, a concrete slab is ideal (although you could use gravel or compacted earth for a simpler, less permanent base). Pouring a concrete base is a bit more involved, but really helps with stability and longevity. Make sure your base is level and extends beyond the shed's dimensions to create a solid footprint.
2.2. Framing the Walls and Roof â€" The Skeleton of Your Shed
This is where the pressure-treated lumber comes in. Cut the lumber according to your plan, creating the framework for the walls. For a lean-to, one wall will be the existing structure you're attaching the shed to. The other wall(s) and the roof rafters will need careful measurement and cutting to create the right angles and support. Use a spirit level to ensure everything is perfectly plumb and square â€" this will make the final structure much stronger and more weather-resistant. Remember to use appropriate nails or screws to secure each joint, ensuring strong support points and correct angles.
2.3. Sheathing the Walls and Roof â€" Skinning the Shed
Once the frame is up, it's time to add the sheathing â€" plywood or OSB. This provides a solid surface for the roofing and siding. Ensure the sheets are securely fastened to the frame with nails or screws. Pay close attention to alignment â€" using straight edges and your spirit level will help you get it perfect. Again, remember to leave gaps for ventilation!
2.4. Roofing â€" Keeping the Elements Out
Roofing is crucial â€" you want to protect your precious belongings from the rain! Start by laying down roofing felt to provide a waterproof barrier. Then, install your chosen roofing material â€" shingles, metal sheets, whatever you've chosen. Work carefully and methodically, ensuring overlapping for proper weather protection. You might need a helper to hold the roofing sheets in place while you fasten them down. This step is more important than you might think, especially if you’re in a location that gets a lot of heavy rain or snow.
2.5. Finishing Touches â€" The Finishing Line
Time for the finishing touches! This includes adding any trim, doors (if desired), and windows (for ventilation). Consider adding a simple door and/or small window to improve ventilation, access, and make the whole thing look even better. Paint or stain the exterior to protect the wood from the elements and give it a nice look. Add any other finishing touches you want â€" a shelf inside, some hooks on the walls, etc. And that’s it! You’ve built your lean-to shed.
Phase 3: The Finishing Touches and Maintenance
Once the construction is complete, take some time to inspect your handy work. Check all the fastenings to make sure everything is secure and solid. Apply a couple of coats of exterior-grade paint or stain to protect your hard work and give it a beautiful finished look. Regular maintenance, such as occasional cleaning and checking for any damage, will extend the life of your shed considerably.
Commonly Asked Questions
Q: How long does it take to build a lean-to shed?
A: This depends on the size and complexity, but expect anywhere from a weekend to a couple of weeks, depending on your experience and available time.
Q: Do I need planning permission?
A: Building regulations vary by location. Check with your local council before you begin.
Q: What type of wood is best?
A: Pressure-treated lumber is essential for outdoor use as it resists rot and insect damage.
Q: Can I build a lean-to shed on uneven ground?
A: It's best to level the ground first, using compacted gravel or a concrete slab. Uneven ground will create instability and potentially damage the shed over time.
Q: How do I make it more secure?
A: Use sturdy locks and hinges on any doors, and consider adding extra bracing to the frame for added security.
And there you have it! Building a lean-to shed is a fantastic DIY project that can add considerable value to your property and give you a great sense of accomplishment. Remember to take your time, plan carefully, and enjoy the process. Happy building!
DIY Pallet Shed: How to Use Free Plans to Make a Sturdy Backyard Shed
DIY Pallet Shed: How to Use Free Plans to Make a Sturdy Backyard Shed
Dreaming of a charming backyard shed without the hefty price tag? Building a shed from reclaimed pallets is a fantastic way to achieve that dream! This project combines the satisfaction of a DIY project with significant cost savings. This guide will walk you through the process, utilizing freely available plans to build a sturdy and attractive structure for your garden tools, bikes, or other storage needs. Get ready to transform discarded pallets into a functional and stylish addition to your outdoor space!
Choosing Your Pallet and Plan
The foundation of your project starts with selecting the right pallets. Source your pallets carefully. Look for pallets that are heat-treated (HT) or debarked, indicated by an IPPC stamp, rather than chemically treated (MB) as these may contain harmful chemicals. Inspect each pallet for rot, significant damage, or loose boards. Remember, you'll be stacking these, so ensuring a sturdy base is crucial. Once you've gathered enough pallets (the number will vary depending on the plan you choose), it's time to choose your blueprint.
Numerous free shed plans are available online through websites dedicated to DIY projects, blogs, and even YouTube channels. Search for "pallet shed plans" to find a design that suits your skill level, available space, and desired size. Pay close attention to the dimensions and the materials list. Download and print the plan you select. This will serve as your roadmap throughout the building process.
Preparing the Pallets and Building the Foundation
Cleaning and Repairing
Before you begin construction, thoroughly clean each pallet. Use a wire brush to remove any loose debris, dirt, or ingrained grime. Inspect each board for damage. Replace or reinforce any broken or loose boards using screws, wood glue, and additional wood pieces. This step is vital for ensuring the structural integrity of your shed. A little extra effort upfront will prevent problems later.
Laying the Foundation
Your chosen plan will likely detail the foundation requirements. This could range from a simple gravel base to a more substantial concrete slab. Follow the plan's instructions meticulously. A level and stable foundation is paramount to prevent your shed from becoming unstable or even collapsing. Consider using weed barrier fabric under the gravel base to prevent weed growth.
Constructing the Shed Walls and Roof
With the foundation complete, you'll begin assembling the shed's walls and roof according to your chosen plan. This usually involves disassembling some pallets to create the desired wall sections and roof supports. Precise measurements and careful placement of screws are key to ensuring the structure's stability. Use appropriate-length screws for the thickness of the wood. If your plan suggests using additional supports, such as corner braces or cross-bracing, do not skip these steps. They contribute significantly to the overall sturdiness of the shed.
The roof construction will likely involve creating a simple gable or shed roof. Ensure that the roof is adequately sloped to allow for proper water runoff. Consider adding roofing felt or a similar water-resistant material to protect the interior from the elements. You can further enhance the shed's longevity by applying a weather-resistant sealant to the wood.
Finishing Touches and Personalization
Once the shed's structure is complete, it's time for the finishing touches! Consider adding a door, using leftover pallet wood or purchasing a pre-made door that fits your shed's dimensions. You might also want to add windows for ventilation and light. Consider painting or staining your shed to enhance its appearance and protect it from the elements. A coat of exterior-grade paint or stain will not only improve the aesthetics but also extend the lifespan of your pallet shed. Lastly, personalize your shed with a little landscaping or a small decorative element to make it blend in beautifully with your backyard.
Building a pallet shed is a rewarding experience. With careful planning, attention to detail, and a little elbow grease, you can create a valuable and aesthetically pleasing addition to your property. Enjoy the process and the satisfaction of transforming reclaimed materials into a useful and charming backyard structure!
How to Build a Pallet Shed DIY: Step-by-Step Plans for Outdoor Storage

Constructing a Pallet Shed: A Comprehensive DIY Guide
This comprehensive guide provides a detailed, step-by-step plan for building a robust and aesthetically pleasing pallet shed for outdoor storage. While utilizing reclaimed pallets offers significant cost savings and an environmentally friendly approach, careful planning and execution are crucial for ensuring structural integrity and longevity. This guide assumes a basic understanding of carpentry and the use of common power tools. Always prioritize safety and wear appropriate protective gear throughout the construction process.
Phase 1: Planning and Preparation
Before commencing construction, meticulous planning is essential for a successful project. This phase involves determining the shed's dimensions, gathering necessary materials, and preparing the site.
1.1 Determining Shed Dimensions and Design
The dimensions of your pallet shed should be determined based on your storage needs and the available space. Consider the size and quantity of items you intend to store. A detailed sketch or blueprint, even a rudimentary one, will be invaluable during construction. Factor in the dimensions of standard pallets (typically 48 inches x 40 inches) to optimize pallet usage and minimize cutting.
Consider these factors:
- Storage Capacity: How much space do you need?
- Site Dimensions: Ensure the shed fits comfortably within the allocated area.
- Access: Plan for easy access to the shed's interior.
- Aesthetics: Consider the overall aesthetic and how the shed will integrate with its surroundings.
1.2 Material Acquisition and Preparation
The primary material for this project is reclaimed pallets. Source pallets responsibly, ensuring they are free from harmful chemicals and structural damage. Inspect each pallet thoroughly for rot, insect infestation, or loose nails. You'll likely need a significant number of pallets depending on your chosen dimensions. Supplementing with new lumber might be necessary for structural components like the roof and floor.
Materials List (Approximate, adjust based on your design):
- Reclaimed pallets (quantity varies based on shed size)
- Pressure-treated lumber for the base frame (4x4 or 6x6)
- Pressure-treated lumber for roof supports (2x4 or 2x6)
- Roofing material (e.g., corrugated metal, asphalt shingles)
- Concrete or gravel for the base (optional)
- Nails, screws, and other fasteners
- Wood sealant or preservative
- Safety glasses, gloves, and hearing protection
1.3 Site Preparation
Select a level area for your shed. Clear the area of vegetation, debris, and rocks. Consider installing a concrete or gravel base for improved stability and to prevent water damage. If you opt for a concrete base, pour and allow it to fully cure before proceeding. Leveling the ground is crucial for a stable structure. Mark out the dimensions of your shed using stakes and string.
Phase 2: Base Construction and Pallet Assembly
This phase focuses on building the foundation and assembling the pallet walls.
2.1 Base Frame Construction
Construct a robust base frame using pressure-treated lumber. This frame will provide a level foundation for the pallet walls and improve stability. Cut the lumber to the required dimensions according to your plan. Assemble the frame using appropriate fasteners, ensuring squareness and stability at each corner. Anchor the frame to the ground using concrete anchors or by embedding the base frame directly into the concrete or gravel base.
2.2 Pallet Wall Assembly
Assemble the pallet walls by attaching pallets directly to the base frame. Ensure the pallets are tightly fitted together. You may need to reinforce the pallet structure by adding additional bracing or using longer fasteners. Consider adding a layer of plywood or OSB board to the interior side of each wall for added strength and to create a smoother interior finish.
Tips for Pallet Wall Assembly:
- Inspect each pallet before use and repair any damage.
- Use galvanized nails or screws to minimize rust.
- Stagger the pallet joints for improved strength.
- Use shims to ensure wall alignment.
Phase 3: Roof Construction and Finishing
This phase involves constructing and installing the roof and applying finishing touches.
3.1 Roof Frame Construction
Construct the roof frame using pressure-treated lumber. The design can be simple, such as a gable roof or a shed roof. The chosen design will dictate the amount of lumber required. Cut the lumber to the correct dimensions and assemble the frame, ensuring it aligns correctly with the walls. Secure the roof frame to the top of the pallet walls using appropriate fasteners.
3.2 Roofing Installation
Install the chosen roofing material. Corrugated metal roofing is a cost-effective and durable option. Asphalt shingles provide a more aesthetically pleasing finish but may require more intricate installation. Follow the manufacturer's instructions carefully. Ensure proper overlap to prevent leaks. Secure the roofing material using appropriate fasteners.
3.3 Finishing Touches
Apply a wood sealant or preservative to protect the pallets and lumber from the elements. This will extend the life of the shed and enhance its appearance. Consider adding a door and windows for easy access and ventilation. You can either repurpose existing materials or use new lumber to construct these elements. Add any desired trim or decorative elements to personalize your shed.
Phase 4: Inspection and Maintenance
Before using your new shed, conduct a thorough inspection to ensure structural integrity. Check for loose connections, damaged pallets, or any signs of leaks in the roof. Regularly inspect your shed for damage and perform necessary maintenance, such as repainting or resealing, as needed. This will help ensure that your DIY pallet shed remains a valuable and durable addition to your property for years to come.
Disclaimer: This guide provides general instructions. Always consult local building codes and regulations before starting any construction project. Adapt these instructions to your specific design and needs. Safety should always be the top priority. Improper construction techniques can lead to structural failure. Seek professional assistance if you are unsure about any aspect of this project.
DIY Pallet Shed: How to Create a Reliable Shed with Recycled Pallets

DIY Pallet Shed: Your Guide to a Rustic and Reliable Recycled Haven
Hey there, fellow DIY enthusiasts! So you're thinking about building a shed, but you're also on a budget and want to be a little eco-friendly? Fantastic! Building a shed from recycled pallets is a fantastic way to achieve both. It’s a rewarding project that lets you get creative, save money, and feel good about repurposing materials. This guide will walk you through the process, from planning to the final touches, ensuring you end up with a sturdy and charming pallet shed. Let's get started!Planning Your Pallet Paradise: Before You Even Touch a Pallet
Before you dive headfirst into hammering and sawing, a little planning goes a long way. Seriously, this is the most important part! Rushing this stage can lead to headaches later on.Choosing Your Location
First things first: where will your magnificent pallet creation reside? Consider things like sun exposure (you might want some shade!), proximity to power (if you plan on using electricity inside), and access for deliveries (getting those pallets to the spot!). Make sure you check local building codes and regulations â€" some areas might have restrictions on shed size or placement. Don't want any nasty surprises later!
Shed Size and Design
How much space do you actually need? Are you planning on storing gardening equipment, bikes, or perhaps a collection of vintage lawn gnomes? (We won't judge!) Draw a simple sketch of your desired shed size and layout. Think about the door placement, window placement (if any), and any internal shelving you might want. Remember, pallets aren't exactly known for their precision, so keep your design fairly straightforward.
Gathering Your Materials (Beyond Pallets)
While pallets are the stars of the show, you'll need a few other things. This isn't an exhaustive list, but it’s a good starting point:
- Pallets: Obviously! Aim for pallets that are in relatively good condition. Avoid those with significant rot or pest damage. The more pallets you have, the bigger your shed!
- Hammer and nails (or a nail gun): A nail gun will speed things up significantly, but a hammer and plenty of nails will do the job too.
- Screws: While nails are fine for many parts, screws add extra strength, especially for crucial joints.
- Measuring tape and level: Essential for ensuring everything is straight and square.
- Saw (circular saw is ideal): You'll likely need to cut some pallets to size.
- Safety glasses and gloves: Safety first, folks!
- Post hole diggers (or a shovel): If your design includes posts for support.
- Concrete mix (optional): For setting posts securely into the ground.
- Exterior-grade wood sealant or paint: This will protect your shed from the elements.
- Roofing material: This could be anything from corrugated metal sheets to tar paper and shingles. Consider your budget and the overall look you want.
Building Your Pallet Fortress: Step-by-Step Guide
Okay, now for the fun part! Remember, this is a general guide. Adapt it to your specific design and the condition of your pallets.Preparing the Pallets
Before you start building, inspect your pallets carefully. Remove any loose nails or staples that could cause problems. You might need to pry apart some pallets to get the individual boards, depending on your design. Clean the pallets thoroughly to remove any dirt, debris, or lingering pests. Consider lightly sanding the wood for a smoother finish (though the rustic look can be charming too!).
Constructing the Frame
Start by building the base frame. This will be the foundation of your shed, so make sure it’s sturdy. Use strong pallets or individual planks for the corners. You can create a simple rectangular frame or a more complex design depending on your plan. Once the base is complete, build the walls, using pallets either vertically or horizontally, depending on your aesthetic preference and the structure's intended load capacity. Remember to check the level frequently!
Adding the Roof
The roof is where you'll need to get a little more creative. You can build a simple gable roof using more pallets, or opt for a more complex design if your carpentry skills allow. Once the roof frame is built, attach your chosen roofing material. Make sure it's securely fastened to protect your shed from rain and snow.
Door and Window Installation (Optional)
Adding a door and window(s) is a great way to make your shed more functional and aesthetically pleasing. You can use pallets to create the door frame and infill it with solid wood or plywood for added privacy and weather protection. For windows, you might want to use pre-made window frames or get creative with repurposed materials.
Finishing Touches
Once the structure is complete, it’s time to add the finishing touches! Apply your chosen sealant or paint to protect the wood from the elements. This will also enhance the overall look of your shed. Consider adding additional features like shelves, a work bench, or even some external lighting.
Safety First!
Building a shed can involve some risks, so prioritize safety throughout the project. Wear safety glasses and gloves whenever you're using tools. Be careful when handling pallets, as some may have splinters or sharp edges. If you're using power tools, make sure you know how to operate them safely and follow all instructions.
Commonly Asked Questions
Here are some questions that often pop up when people are building pallet sheds:
Q: How much does it cost to build a pallet shed?
A: The cost varies greatly depending on the size of your shed and the materials you choose for things like roofing. The beauty of using pallets is that they’re often free or very cheap to acquire, so your primary costs will be the additional materials like screws, roofing, and sealant.
Q: How long does it take to build a pallet shed?
A: This depends on the size and complexity of your shed, as well as your experience level. A smaller, simpler shed could take a weekend, while a larger, more complex one might take several weeks.
Q: How long will a pallet shed last?
A: With proper treatment and maintenance (sealing, etc.), a well-built pallet shed can last for several years. The lifespan depends on the quality of the pallets you use and the climate where it’s located.
Q: Are pallets safe to use?
A: Generally yes, but it's crucial to inspect them carefully before use. Make sure they are free from rot, pests, and any hazardous materials. Thorough cleaning is essential!
Q: Can I use pallets that have been treated with chemicals?
A: You should avoid using pallets treated with chemicals unless you are absolutely certain they are safe for use in an outdoor structure. Check for markings on the pallets to identify any treatments.
I hope this comprehensive guide has helped you on your journey to building your own amazing pallet shed! Remember to always prioritize safety, and have fun with the process. Happy building!